If you’re looking for a charming quilt project that radiates love and creativity, the Heart to Heart Quilt Pattern is the perfect match. Designed by Jessica Stern and Stacy Day for Dear Stella, this quilt is a delightful play on color, shape, and precision — ideal for quilters who adore sweet, heartwarming designs.
A Quilt That Speaks from the Heart
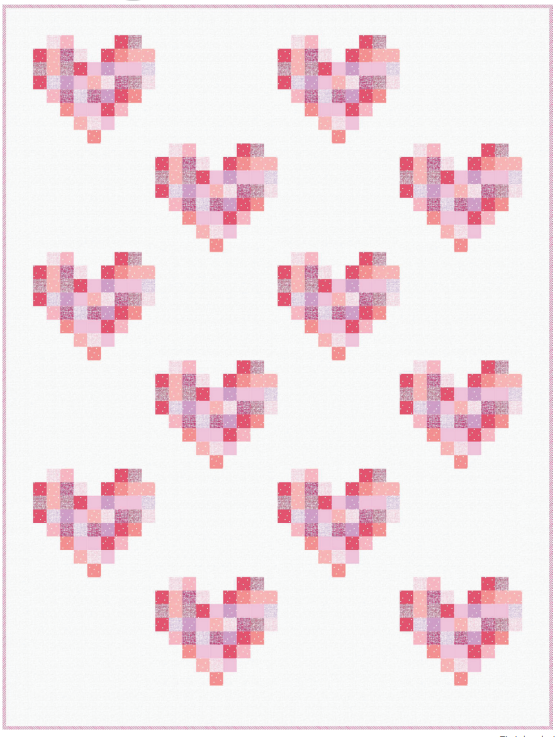
The Heart to Heart quilt brings together the joy of color coordination and the elegance of simple construction. Inspired by the classic postage stamp aesthetic, the quilt features organized strip sets that form vibrant heart blocks. The pink and blush tones make this pattern especially fitting for Valentine’s Day gifts, baby showers, or simply adding warmth to your home décor.
Finished Size
-
Quilt Size: 60½” x 80½”
-
Block Size: 13½” x 12″
Whether you’re gifting this to a loved one or keeping it for yourself, the finished piece is large enough to serve as a cozy throw or even a lightweight bed quilt.

Materials You’ll Need
This pattern uses a range of “Net” and “Polka Dot” prints in romantic hues like bubblegum, lilac, blush, and peony. You’ll need:
-
Various fabrics from Dear Stella (including Net Stella-370 and Polka Dot Stella-187)
-
Batting (68″ x 88″)
-
Backing fabric (about 5⅜ yards)
-
Binding fabric (½ yard)
Making the Heart Blocks
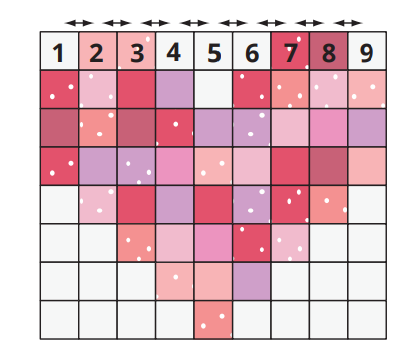
Using 2″ x 28″ strips in curated color combinations, you’ll assemble 9 strip sets. Each strip set is crosscut into twelve 2″-wide segments. When arranged correctly, these segments create heart-shaped blocks that pop against the background. The step-by-step diagram and strip set chart make it easy, even for intermediate quilters.
You’ll make 12 heart blocks in total — the perfect centerpiece for your quilt layout.
Make 12.
Quilt Assembly and Borders
The pattern guides you to alternate heart blocks with solid rectangles in four vertical rows. Border strips are added to frame the design and give the quilt a polished, framed look. The instructions are clear and beginner-friendly, yet detailed enough to satisfy experienced quilters.
Finishing Your Quilt
Finish by assembling your backing, layering it with batting and your quilt top, and quilting as desired. The final step is binding, which you can personalize with straight or bias-cut strips for a diagonal effect.
This quilt is not only beautiful but also fun to make — a perfect weekend project!