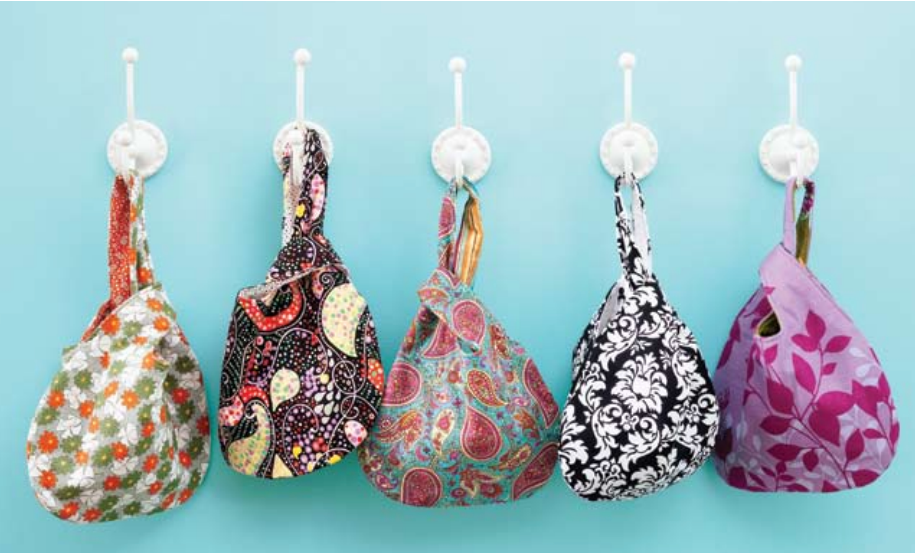
If you’re looking for a fun and functional sewing project that’s perfect for beginners, this Grab Bag pattern is just what you need! Whether for groceries, gifts, or everyday use, these quilted tote bags are quick to make and great for showing off your favorite fabrics.
🧵 What is a Grab Bag?
A Grab Bag is a small quilted tote with a boxed bottom and short handles. It’s the perfect size to grab and go—ideal for storing craft supplies, snacks, or as a reusable gift bag.
This beginner-friendly pattern lets you practice piecing, quilting, and bag construction—all in one satisfying project.
🧺 Materials You’ll Need
-
2 coordinating cotton fabrics (one for exterior, one for lining)
-
Cotton batting
-
Matching thread
-
Basic sewing tools (pins, rotary cutter, scissors, iron)
-
Sewing machine
Optional: fusible interfacing for extra stiffness if desired.
✂️ Step-by-Step Grab Bag Instructions
-
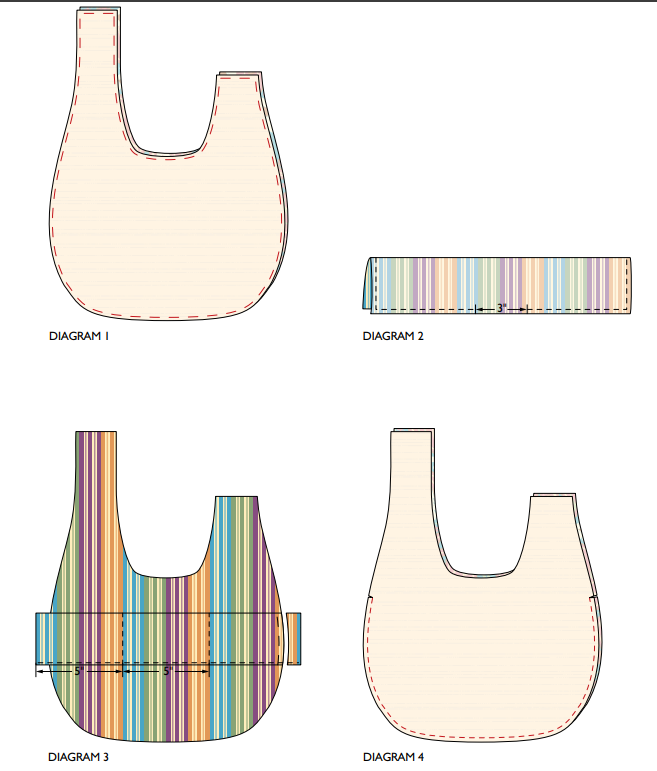
Cut Your Fabrics
-
Cut two rectangles each of the outer fabric, lining fabric, and batting.
-
Approx. size: 12″ x 14″ for a small bag.
-
-
Quilt the Exterior Panels
-
Place the batting between the outer fabric pieces and quilt as desired (simple straight lines work great for beginners).
-
-
Sew the Bag Body
-
Sew the quilted panels together along the sides and bottom.
-
Repeat with the lining fabric, leaving a small gap in the bottom for turning later.
-
-
Box the Corners
-
Flatten each bottom corner to form a triangle and sew across to create depth.
-
Repeat for lining.
-
-
Make the Handles
-
Cut two strips of fabric (around 3″ x 12″), fold and stitch to create sturdy handles.
-
Optional: use fusible interfacing for extra grip.
-
-
Assemble the Bag
-
Pin handles to the outer bag, right sides together.
-
Place the outer bag inside the lining, aligning seams and handles.
-
Sew around the top edge.
-
-
Turn and Finish
-
Pull the bag through the gap left in the lining.
-
Stitch the gap closed.
-
Topstitch around the top edge for a polished finish.
-
💡 Why You’ll Love This Project
-
Perfect for fat quarters and fabric scraps
-
Great for quick weekend sewing
-
Ideal as reusable gift bags
-
Teaches basic quilting and bag construction
-
Fully customizable with different colors and sizes
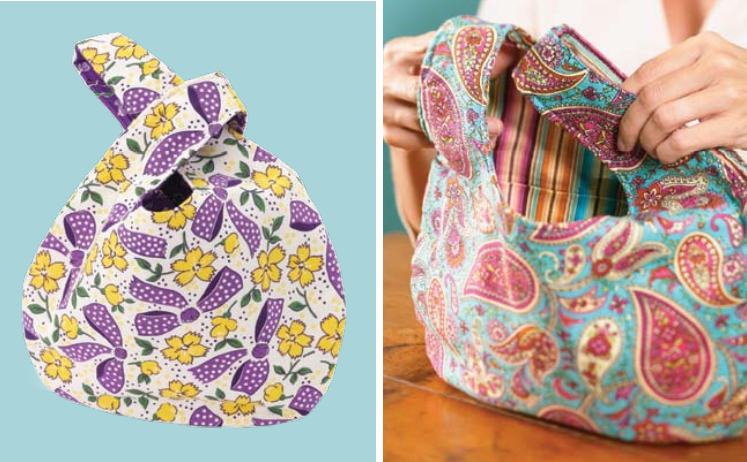
This quilted grab bag is an easy project that’s both satisfying and practical. It’s a fantastic introduction to bag-making for quilting beginners and can be made in a variety of prints to suit any style or season. Try making a set for different uses—craft supplies, books, groceries, or gifts!
📥 Don’t forget to Download the free PDF pattern and start sewing today!